

Invoices for rentals or memberships
For customers renting a space or purchasing a membership for a specific period:- Go to Customers and open the customer’s profile.
- Create a subscription.
Invoices for one-off purchases
For purchases such as resource bookings, event tickets, and Shop orders:- The customer completes the purchase through the member web portal or mobile app and pays through a payment gateway. 2. Alternatively, an administrator can create a one-off booking for the customer using the External payment method. 3. RNTOR automatically generates the corresponding one-off invoice.
Manual one-off invoices
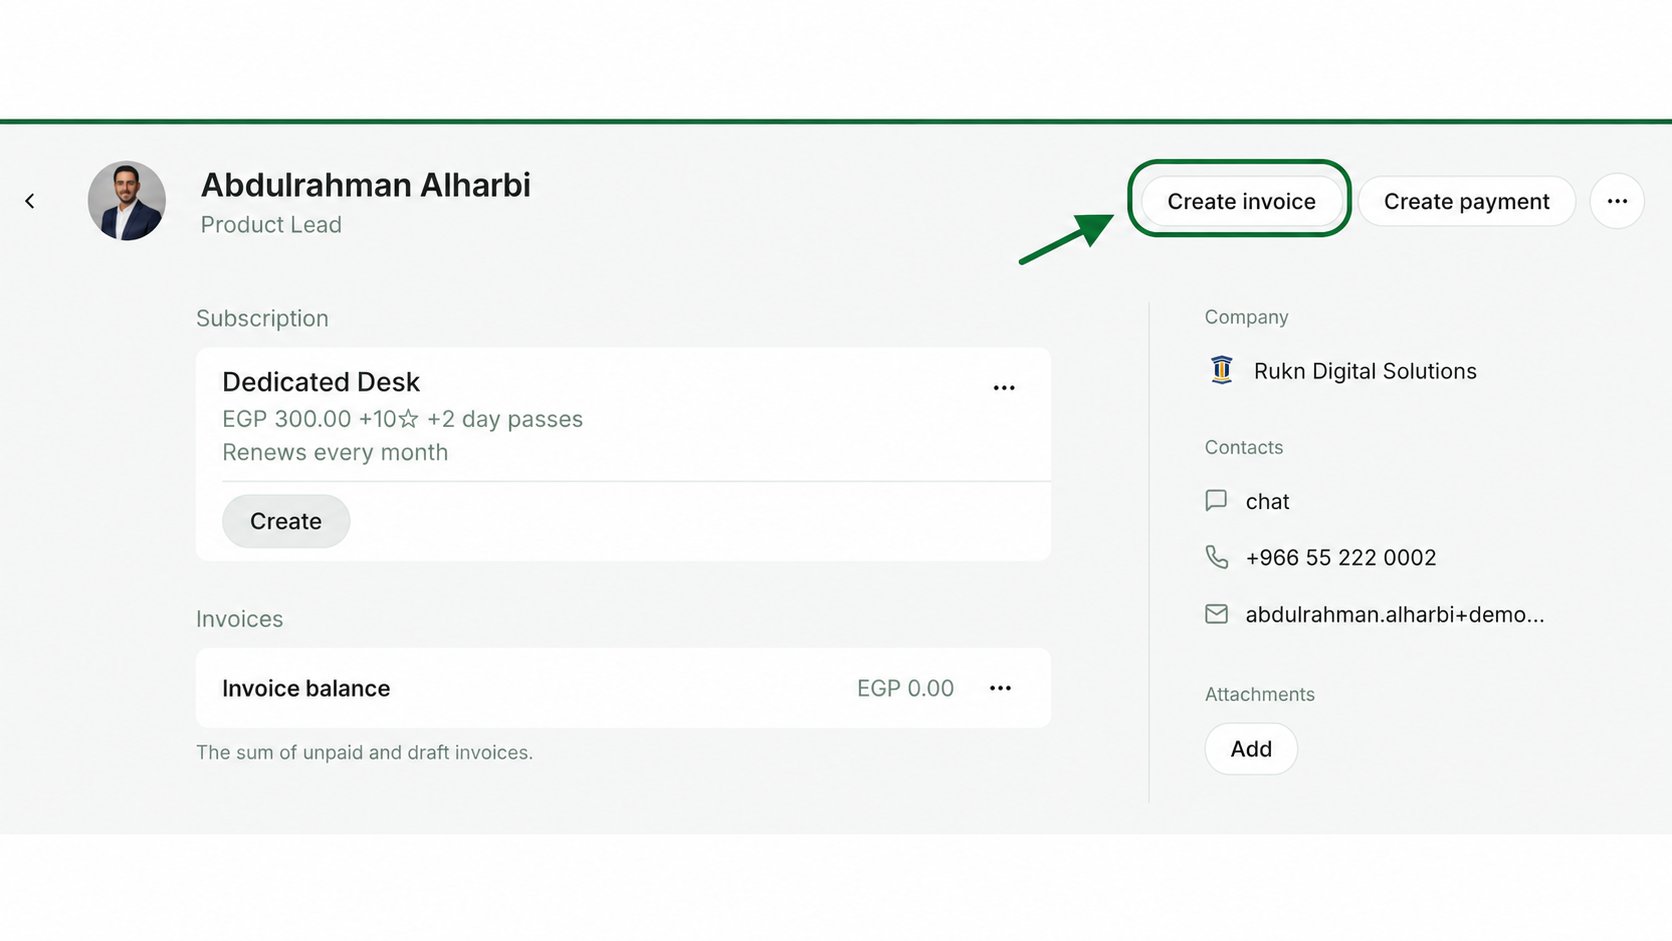
For occasional charges that are not connected to a subscription, rental, booking, or another specific purchase, administrators can manually create a one-off invoice for any customer.- Go to Billing > Invoices, or open the customer’s profile.
- Click Create invoice in the top-right corner.
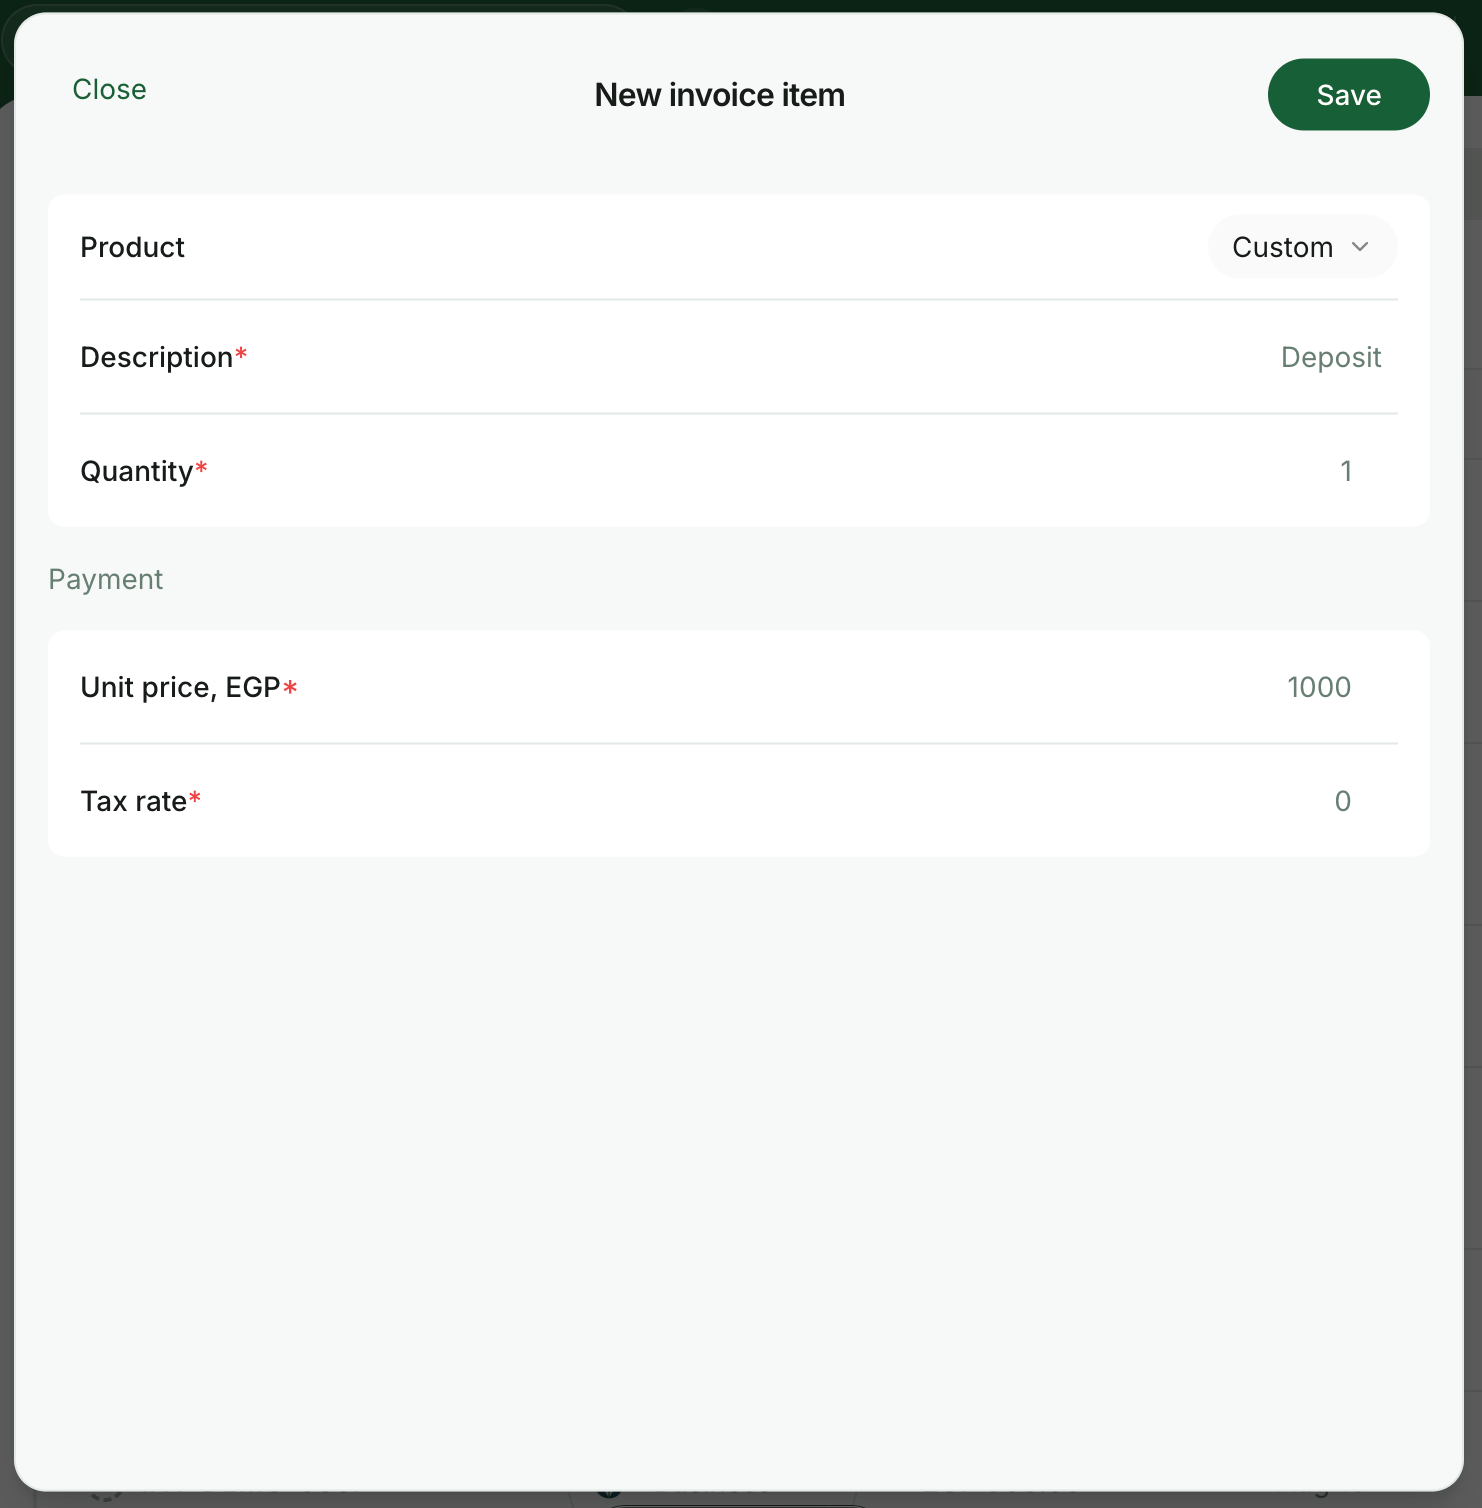
- Click Add. In the Product field, select an existing product or keep Custom selected to enter a unique item and price.
- Enter the Quantity, complete the remaining fields, and click Save.
- Optionally, add an internal note for your team’s payment records and set a custom payment due date. Then click Create.
- Click View invoice in the confirmation message.
- Click Issue. If the customer has any saved payment methods, the Issue and charge option will also appear, allowing you to charge the invoice immediately.
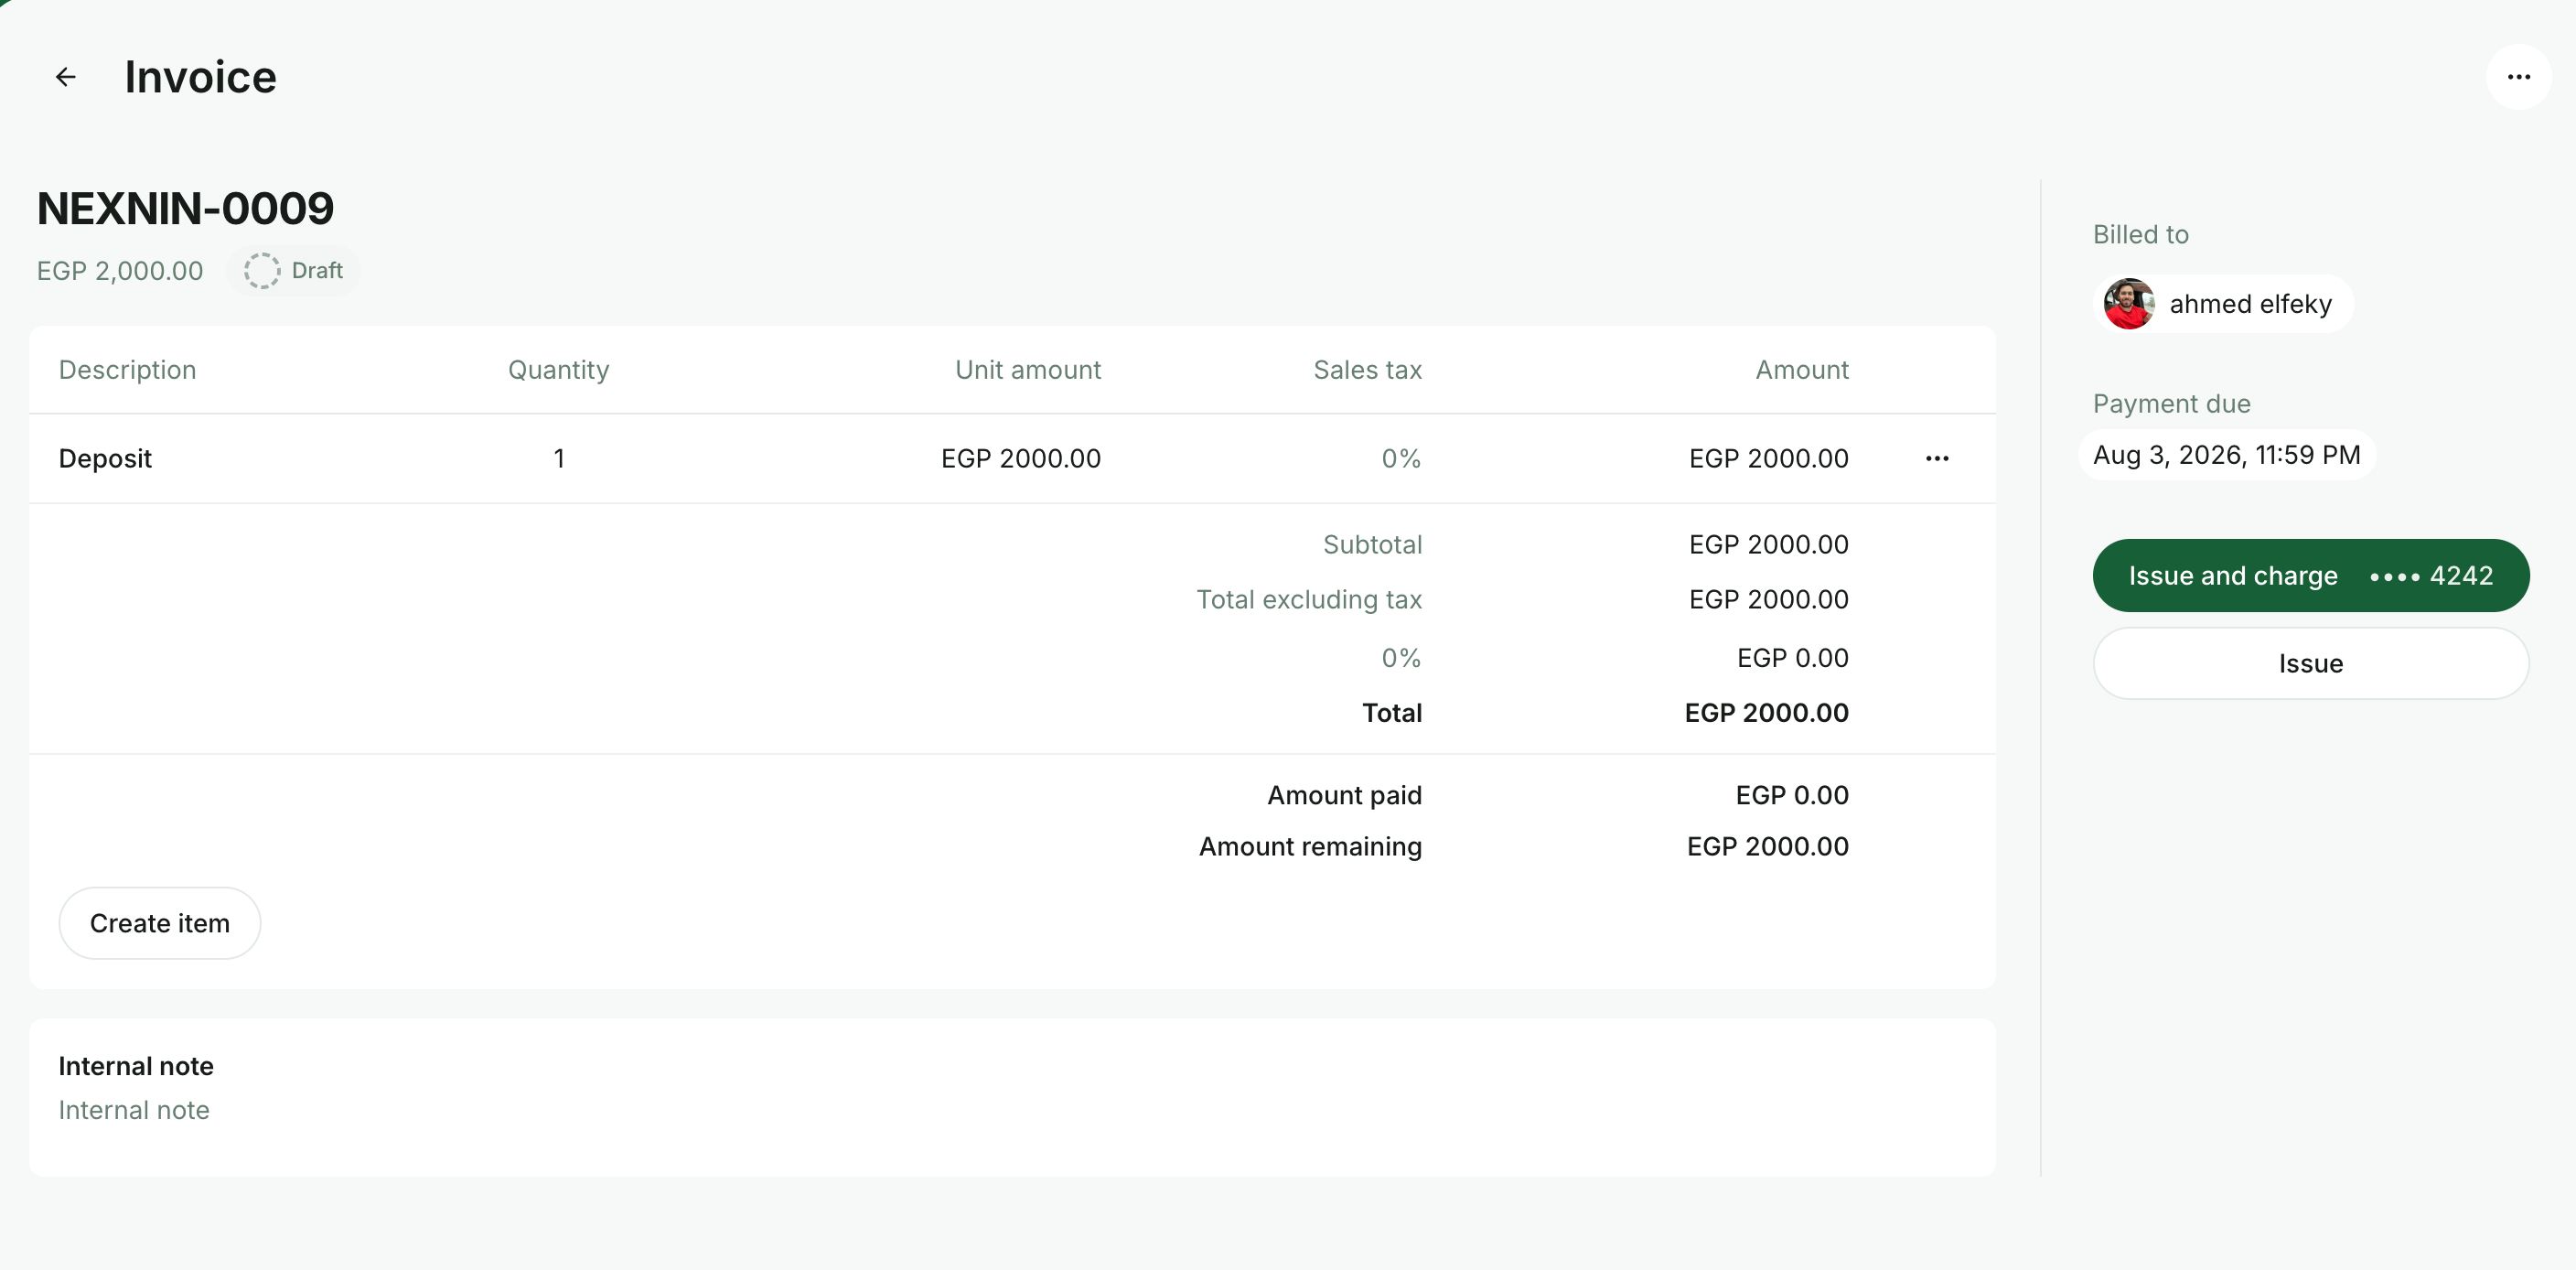
If Require billing details is enabled, the customer’s billing details must be added to their profile before the invoice can be issued.
Manually created invoices use today’s issue date and the next available invoice sequence number.
FAQ
Why do I see an error asking me to update the customer's billing information before I can issue an invoice?
Why do I see an error asking me to update the customer's billing information before I can issue an invoice?
This happens for one of two reasons:
- Require billing details is turned on for Company or User customers in your location. Their Legal business name, Address, and Tax ID must be filled in before you can issue the invoice. You have a few options:
- Fill out the customer’s billing details yourself: in the customer’s profile, locate the Billing details section > Edit > fill in Legal business name, Address, and Tax ID. Issuing the invoice will then become possible.
- Ask the customer to add their own billing details: they can do this on the Membership > Billing page. Once saved, issuing the invoice will become possible.
- If you don’t actually need this requirement, disable Require billing details for Users and/or Companies: tap the **settings **> Location settings > Customers > toggle it off for the relevant type. Then you’ll be able to issue the invoice without the customer’s billing details.
- eInvoicing is connected for your location. Every invoice must be submitted as an eInvoice, which legally requires the customer’s billing details, regardless of the Require billing details setting above. Your options depend on the customer type:
- For a Company invoice, fill out the company’s billing details (Customers > company > Billing details section > Edit), or ask the company manager to add them (Membership > their company’s section > Billing).
- For a User invoice, fill out the user’s billing details (Customers > user > Billing details section > Edit), or ask the user to add them (Membership > Personal > Billing).
- For a User invoice, if you don’t need it synced as an eInvoice and don’t need the invoice to include the customer’s billing details, disable Require billing details for Users, and make sure the user’s Legal business name and Tax ID fields are both left empty (clear them if they were previously filled in). With both empty, RNTOR treats the customer as a simplified consumer, skips the eInvoicing sync for that invoice entirely, and lets you issue it without billing details.
This last option isn’t available for company invoices — when eInvoicing is enabled, billing details are always required to issue a company invoice.